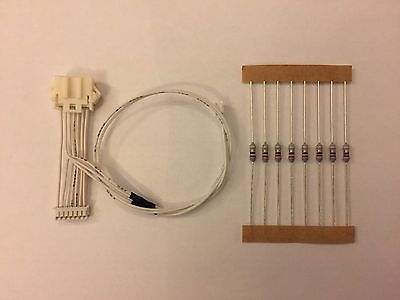
Super Easy Fuser Counter Reset Solution for OKI C96xx and C98xx printers.
Installation procedure is very simple.
Turn off the printer - open back cover (only 4 screws. Two of them are hand removable and the rest of two require screw driver) - pull the yellow cable - connect it to male side of reset cable - connect the female side of the reset cable to the printer - Turn on the printer. Done!
Easy job which can be done within 1-2 min.
- No Hacking / No Welding.
- No toner proof vacuum cleaner required.
Please watch the installation video available from Youtube.
https://www.youtube.com/watch?v=NQUqrlhDnk8&feature=youtu.be
Extend the printer fuser life with ease. Re-use your fuser for one more cycle.
Full instruction is provided with the chip.
- No Welding / No Soldering Required.
- No Firmware Hacking
- DIY within 2 min.
- Save your Time and £££.
- Put the remaining life of fuser back to 100%
Important things to know before purchase
If you have any printing quality issue caused by the fuser unit, please be advised that this chip/cable will not fix the fuser unit's physical damages. This will not improve the printing quality caused by the fuser unit.


![Super Easy Drum, Belt & Fuser Reset Kit for OKI C332 C511 C531 dn dnw [C5H-C331]](http://www.drumreset.com/cdn/shop/products/1_e146d181-4357-40e5-b9df-44837345ede0_large.jpg?v=1504652935)
![Super Easy Drum, Belt & Fuser Reset Kit for OKI C532 C542 MC563 MC573 [C5H2-573]](http://www.drumreset.com/cdn/shop/products/1_634aba75-b4f9-4aa0-bc72-37e9f155afbc_large.jpg?v=1504575824)
![Super Easy Drum, Belt & Fuser Reset Kit for OKI MC362 MC363 MC562 MFP [C5H-562]](http://www.drumreset.com/cdn/shop/products/1_2f0a648e-986f-4666-8ec2-b3e97736261f_large.jpg?v=1504653019)
